Install MagicQuill Locally – Awesome Free AI Image Editing Software

Introduction
Hello there and welcome!
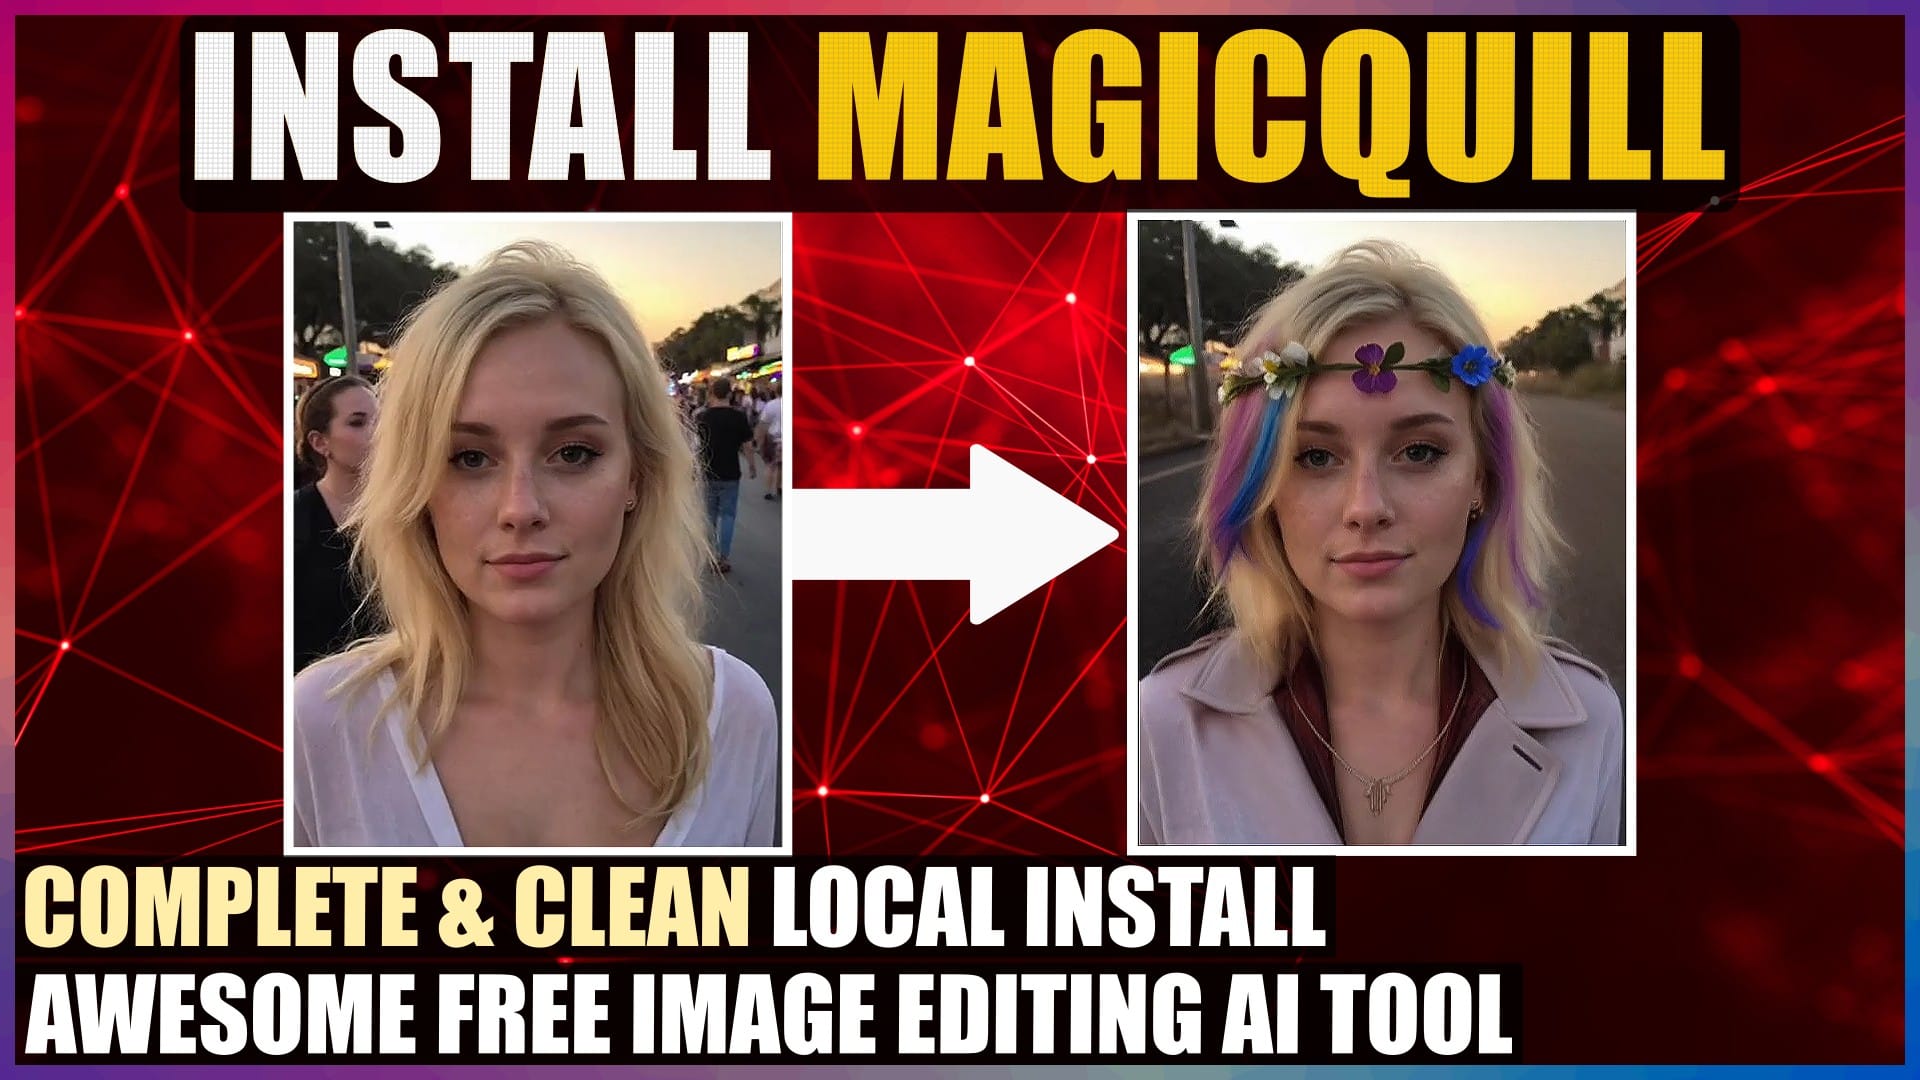
MagicQuill’s one of those tools, that’s certainly worth having in your AI toolbox. It’s a super quick and easy way to edit images, and can certainly rival some of the functionality of paid tools. If you’re looking for a no-nonsense, completely free, unlimited and uncensored tool for AI image edits, then it currently doesn’t get any easier or better, than MagicQuill.
MagicQuill has 3 core image editing functions: You can add elements to an image, you can remove elements from an image, and you can change different image element colours.
To give you precise control and quality results, everything is done intuitively and simply, using just a brush and text prompt.
Although I CAN do much of the same type of inpainting and outpainting, with other tools that I have, such as Automatic1111, Forge UI and Fooocus, I tend to use MagicQuill for many of them now, because it’s just a lot quicker and easier to open the standalone MagicQuill app, do the edit, produce a high quality precise result, and get back out. Easier and less hassle.
In this video, we’ll walk through the complete, clean and fresh, step-by-step process, to fully install MagicQuill, on your local machine, so you can get straight on with using it, without running into any install errors.
I’ll be installing everything on a Windows 11 PC, running a CUDA capable NVIDIA GPU with 8GB of VRAM, which is the minimum amount of VRAM that you’ll need to run MagicQuill.
I’ll leave all the links and references that I cover in this tutorial, in the Resources section at the end.
So, let’s crack on.
Install Process Overview
There’s a number of installation steps that we’ll go through. Each step is actually pretty straight forward, and quick and easy, to follow along to and complete. Many of you, will have a lot of the required pieces of software, installed on your machine already, so if you do, you can jump straight past those sections of the tutorial.
We’ll be pretty much following the relevant Windows install steps on the official MagicQuill GitHub page, so if things change, you can always refer to this page for appropriate updates.
So, let’s get stuck into it.
Check NVIDIA GPU is CUDA Capable
Step 1, is to make sure we actually have a CUDA capable NVIDIA GPU. CUDA, is basically an NVIDIA technology, that gives a significant processing speed boost to CUDA capable NVIDIA GPUs. Most newer NVIDIA GPUs are CUDA capable.
If you already know that you have a CUDA capable NVIDIA GPU, then you can skip to the next step. If you don’t know whether your NVIDIA GPU is CUDA capable, then take a look at the official NVIDIA GPU CUDA list. Unfortunately, if you don’t have an NVIDIA CUDA capable GPU, then you won’t currently be able to install MagicQuill on your local machine.
Install CUDA 11.8 Compatible NVIDIA GPU Driver
Step 2, is to make sure we have an NVIDIA GPU driver version, of at least 452.39 installed, which is the minimum driver version required to utilise the CUDA version 11.8, that we’ll be using during this installation. If you already know that you have at least driver version 452.39, then you can skip to the next step.
To check our driver version, we’ll right-click on our Desktop, and select “Show more options”, then select “NVIDIA Control Panel”. On the opening NVIDIA Control Panel window, our driver version and GPU are shown. In my case, I have a driver version above the minimum required 452.39 installed, so I’m good to go, but I’ll update it to the latest version anyway, to get all the latest improvements. If you have a driver version below 452.39, then you’ll need to make sure you take a note of your GPU model number, and update your driver. In my case I have an NVIDIA GeForce RTX 3070 GPU.
Let’s find, download and install the latest driver for our GPU. We’ll open the NVIDIA drivers download page in our browser. This is where we’ll need to select our GPU model, that we made a note of previously. Let me select mine. “GeForce”, “RTX 30 Series”, “GeForce RTX 3070”. For “Operating System”, I’m running 64-bit Windows 11, so I’ll select Windows 11. I’ll leave the default “US English” language, and click “Find”.
There’s two types of NVIDIA drivers available. A “Game Ready Driver”, which is best for gaming, offering priority gaming support and speedy fixes. Then there’s the “Studio Driver”, aimed at Content Creators, offering a focus on stability and quality. I’ll select the Game Ready Driver, by clicking on its “View” button, because I like to have all the latest bug fixes and speed improvements.
The download page for my specific driver will open, showing the driver details, including the driver version. We just click the “Download” button. On the “Save As” window, we’ll navigate to the root of my E drive, then click Save, to save the file here. The file will take a little while to download.
Once the file has finished downloading, we’ll navigate to my E drive. In here, we can see the downloaded “driver.exe” file. We’ll double-click this file to begin the installation process.
The installation process first needs to extract the required files. We’ll click “OK” to confirm the default extraction location, and extract the required files. All these files will be auto deleted after installation.
Once all the files have been extracted, the first installation window will pop up. Here, we have the choice to either install the NVIDIA driver AND the “GeForce Experience”, or just the NVIDIA driver. The GeForce Experience adds additional functionality, and auto checks for driver updates in the future. I don’t need the additional bloat, so I’ll select to install only the driver. Then we’ll click the “Agree and Continue” button.
On the next install window, we have the choice between an “Express” or “Custom” install. The main difference between the two options, is that the Express option retains our current NVIDIA settings, and the Custom option allows us to reset all settings during install. We’ll select the Express option, and then click “Next” to start the installation, which will take a bit of time.
Eventually, a message will be shown, saying that “NVIDIA Installer has finished”. We’ll click the “Close” button.
Let’s have a quick check to make sure the correct NVIDIA driver, has been installed correctly. We’ll show our Desktop. We’ll right-click on our Desktop, and select “Show more options”, then select “NVIDIA Control Panel”. We can now see the updated driver version, that we just installed shown. Everything looks good. We can close the window.
OK. That’s the latest NVIDIA driver installed. Onto the next step.
Install Git
Step 3, is to install Git, so we can copy the MagicQuill files to our computer in the next step, and use Git to run future updates automatically, if needed. If you already have Git installed, then you can skip to the next step.
We’ll open the Git download page in our browser. I’m running a 64-bit version of Windows, so we’ll click on the Windows link. The “Download for Windows” page will open. Then we want the “Standalone Installer”, so we’ll click on the “64-bit Git for Windows Setup” file link. On the “Save As” window, we’ll navigate to the root of my E drive, then click Save, to save the file here.
Once the file has finished downloading, we’ll navigate to my E drive. In here, we can see the downloaded “Git.exe” file. We’ll double-click this file to begin the installation process. If a “Do you want this app to make changes to your device” warning window pops up, we’ll click the “Yes” button. Then we’ll just click the “Next” button, on the next 13 setup windows, to accept the default installation settings. On the last setup window, we’ll click the “Install” button, to start the installation process. The installation won’t take very long.
Once the installation has completed, the completion window will be shown. We’ll untick the “View Release Notes” checkbox, and click the “Finish” button.
OK. That’s Git installed. Onto the next step.
Clone MagicQuill GitHub Repository
Step 4, is to download all the MagicQuill files to our computer, by cloning the official GitHub repository using Git. I want to install MagicQuill in the root of my E drive, so we’ll navigate there. Then, we’ll click into the address bar, and type in “cmd”, and press “Enter”. This will open the Command Prompt in this location.
At the prompt, we’ll copy and paste in Syntax 01, to clone the MagicQuill GitHub Repository. Then we press “Enter”. It won’t take very long to download all the files. Once cloning has completed, the prompt will return to the starting prompt state. We can now close the Command Prompt window.
If we go into my E drive, we can see a new “MagicQuill” parent folder. And if we go into this folder, we can see all the folders and files that were downloaded to our computer.
OK. That’s MagicQuill cloned. Onto the next step.
Download MagicQuill Models
Step 5, is to download the MagicQuill models, plus a number of other files, that are used to produce the edited image results.
We’ll open our browser, and in the address bar of a new tab, we’ll copy and paste the models direct download URL link, and then press “Enter”. On the “Save As” window, we’ll navigate to the root of my E drive, then click Save, to save the file here. The file is about 28 gigs in size, so it’ll take a fair amount of time to download.
Once the file has finished downloading, we’ll switch over to my E drive, and we can see the “models.zip” file in here. We’ll unzip this file, using 7-Zip, as it’s much faster and does the job error free. We’ll right-click on the “models dot zip” file, “Show more options”, “7-Zip”, “Extract to /models”, to keep all the extracted folders and files contained within a folder. It’ll take a while to extract all the folders and files.
Once the extraction process has completed, we can see the extracted “models” parent folder. We’ll double-click this folder to open it. There’s a number of folders and files in here, but we’re only interested in the “models” sub-folder in here. If we go into this folder, we can see all the folders and files that we need. We’ll go back out, and copy this “models” sub-folder. Then we’ll go into our MagicQuill parent folder, and paste it in here. It’ll take a little while to copy over. Once it’s finished, we can go back out, to the root of my E drive, and delete both the downloaded “models dot zip” file, and the extracted “models” parent folder, to free up some disk space.
OK. That’s the MagicQuill models done. Onto the next step.
Install Miniconda
Step 6, is to install Miniconda, which we’ll use to create a MagicQuill virtual environment in the next step. Although this step, and the creation and use of a virtual environment, is technically optional, it’s certainly good practice and highly recommended, to keep everything for MagicQuill segregated, and prevent any issues with any other software, we have installed on our computer. If you already have Miniconda or Conda installed, then you can skip this step.
We’ll open the Miniconda download page in our browser. We’ll scroll down a bit, past the “Anaconda Installers” section, to the “Miniconda Installers” section. This is the latest version of Miniconda, that comes bundled with the latest version of Python. We won’t actually be using this latest Python bundled base version at all. Instead, when we create virtual environments, we’ll follow best practices, and create them with specific versions of Python that we stipulate at the time, which Miniconda allows us to do seamlessly. We’ll actually be using Python version 3.10 for MagicQuill. Anyway, I’m running Windows 64-Bit, so we’ll click on the “Windows 64-Bit Graphical Installer” file link. On the “Save As” window, we’ll navigate to the root of my E drive, then click Save, to save the file here.
Once the file has finished downloading, we’ll navigate to my E drive. In here, we can see the downloaded “miniconda3.exe” file. We’ll double-click this file to begin the installation process.
We’ll just click “Next” on the first setup window. “I Agree” on the next window. On the next “Install Type” window, we’ll leave it at the recommended default, to install for “Just Me”, and click “Next”. On the next “Install Location” window, we’ll leave it at the default location, under our Username, and click “Next”.
On the last “Advanced Options” window, we’ll leave the first “create shortcuts” checkbox ticked. We’ll also tick the second “add to PATH” checkbox. We won’t worry about the warning message that appears. The warning is based on a legacy issue for mainly non-Windows systems, and for us Windows users, ticking this option, saves us the hassle of fully adding Miniconda to PATH manually, after installation. Then we’ll make sure that the third checkbox is UNTICKED, since we DON’T want to add the bundled latest Python version to our system registry, as the default version, in case it overwrites any current Python version already set, that our system may rely on. We’ll also tick the last “clear cache” checkbox, to delete the temporary install files after installation, to save disk space and keep things tidy. Then we’ll click “Install”, to start the installation process. The installation won’t take very long.
When it’s completed, on the “Installation Complete” window, we’ll click “Next”. On the final window, we’ll untick the two checkboxes, and click the “Finish” button.
OK. That’s Miniconda installed. Onto the next step.
Set Up MagicQuill Conda Virtual Environment
Step 7, is to use Conda to create and activate a virtual environment for MagicQuill, named “MagicQuill”, with Python 3.10.
We’ll navigate to, and open the “MagicQuill” parent folder in my E drive. Then we’ll click into the address bar, and type in “cmd”, and press “Enter”, to launch the Command Prompt window in this location. At the prompt, we’ll copy and paste in Syntax 02, to create a new Conda environment, named “MagicQuill”, with the latest version of Python 3.10. Then we press “Enter”. It won’t take very long to create the virtual environment.
Once the environment has been successfully created, the prompt will return to the starting prompt state. By the way, you can always find all the virtual environments that you create, in the miniconda3 environments folder, under your username. I’ll leave the full PATH in the description below for you.
Now we need to activate our new “MagicQuill” virtual environment. At the prompt, we’ll copy and paste in Syntax 03, to activate the environment. Then we press “Enter”. It won’t take long to activate. Once it’s activated, we’ll see the virtual environment name “MagicQuill”, in brackets, preceding the prompt. Don’t close the Command Prompt window, we’ll come back to it shortly.
OK. That’s the MagicQuill virtual environment created and activated with Conda. Onto the next step.
Install CUDA-Enabled Torch Files
Step 8, is to install CUDA-enabled Torch with GPU support.
We’ll switch back to our Command Prompt window. Still in the MagicQuill active virtual environment, at the prompt, we’ll copy and paste in Syntax 04, to download and install the CUDA 11.8 Torch files. Then we just press “Enter”. It’ll take a fair amount of time, to download and install everything.
Once everything has completed successfully, the prompt will return to the starting prompt state. Don’t close the Command Prompt window, we’ll come back to it shortly.
OK. That’s the CUDA-enabled Torch files installed. Onto the next step.
Install Gradio Web User Interface
Step 9, is to install the Gradio Web UI, so that we have a nice graphical user interface to use MagicQuill through.
We’ll switch back to our Command Prompt window. Still in the MagicQuill active virtual environment, at the prompt, we’ll copy and paste in Syntax 05, to download and install the Gradio files. Then we press “Enter”. It won’t take too long to install everything.
When it’s completed, the prompt will return to the starting prompt state. Don’t close the Command Prompt window, we’ll come back to it shortly.
OK. That’s the Gradio Web UI downloaded and installed. Onto the next step.
Install Llava Environment
Step 10, is to install the Llava environment, which is used for visual and language understanding.
We’ll switch back to our Command Prompt window. Still in the MagicQuill active virtual environment, at the prompt, we’ll copy and paste in Syntax 06, to copy over some required Llava environment files. Then we press “Enter”. It won’t take long to copy over the files. When it’s completed, the prompt will return to the starting prompt state.
We now need to install the Llava environment. At the prompt, we’ll copy and paste in Syntax 07. Then we press “Enter”. It won’t take too long to install everything. When it’s completed, the prompt will return to the starting prompt state. Don’t close the Command Prompt window, we’ll come back to it shortly.
OK. That’s the Llava Environment downloaded and installed. Onto the next step.
Install MagicQuill Requirements and Dependencies
Step 11, is to install the MagicQuill requirements and dependencies.
We’ll switch back to our Command Prompt window. Still in the MagicQuill active virtual environment, at the prompt, we’ll copy and paste in Syntax 08, to download and install a bunch of required packages. Then we just press “Enter”. It won’t take too long to download and install all the required packages. Once everything has completed successfully, the prompt will return to the starting prompt state. Don’t close the Command Prompt window, we’ll come back to it shortly.
OK. That’s the MagicQuill requirements and dependencies downloaded and installed. Onto the next step.
Run MagicQuill for the 1st Time
Step 12, is to finally run MagicQuill for the first time. We’ll switch back to our Command Prompt window. Still in the MagicQuill active virtual environment, at the prompt, we’ll copy and paste in Syntax 09, to launch MagicQuill. Then we press “Enter”.
The first time we run MagicQuill, it will take some time, as a number of additional files need to be downloaded and installed. Subsequent launches of MagicQuill, will be much quicker. Eventually, a local URL will be shown in the Command Prompt window. We just hold down our “Control” key on our keyboard, and click the URL link with our mouse. If MagicQuill opens in your browser, then congratulations, you’ve just installed MagicQuill successfully.
Make sure you don’t skip the next bonus step, to automate the launching of MagicQuill in the future.
Run MagicQuill Again with Automation Script
Step 13 is optional, but highly recommended, to save us time and hassle every time we want to launch MagicQuill again.
Launching MagicQuill the manual way, is just too much hassle, plus we need to remember all that syntax. To run it manually, we would need to launch the Command Prompt window from within our MagicQuill parent folder, remember and type in the syntax to activate the MagicQuill conda virtual environment, then finally remember and type in the syntax to run the app using the Gradio Web UI.
Instead of that, how about we just have a file, that we double-click, and all of the above manual steps are done for us.Let’s create just that.
We’ll open our MagicQuill parent folder. We’ll right-click in an empty space, select “New”, then “Text Document”. We’ll delete the document default name, AND the “.txt” file extension, and rename it to “run.bat”. And then press “Enter”. On the warning window that pops up, we’ll click “Yes” to confirm we want to change the file extension.
We’ll right-click our new “run dot bat” file, and select “Edit in Notepad”. Now we just copy and paste in Syntax 10. Depending on the location of YOUR MagicQuill installation, you’ll need to change the two locations on lines 2 and 3. Then we just save the file and close it.
Now when we want to run MagicQuill, we just navigate to our MagicQuill parent folder, and double-click our new “run.bat” file. Of course, you could also just create a shortcut to this file on your Desktop, for added convenience. Then when the local URL link appears in our Command Prompt window, we just “Control” and click it, to open MagicQuill using the Gradio Web UI in our browser. Nice and easy.
Conclusion
Now you know how to do a complete and clean install of MagicQuill on your Windows PC, running a CUDA capable NVIDIA GPU.
Now you can get on with experiencing the quick, easy and fun way to edit images using MagicQuill AI.
Anyway, hope you found this tutorial helpful, and I’ll catch you in the next one.
Resources
Links
Official MagicQuill GitHub:
https://github.com/magic-quill/MagicQuill
Official NVIDIA GPU CUDA List:
https://developer.nvidia.com/cuda-gpus
NVIDIA Drivers Download:
https://www.nvidia.com/download/index.aspx
Git Download:
https://git-scm.com/downloads
MagicQuill Models Download:
https://hkustconnect-my.sharepoint.com/:u:/g/personal/zliucz_connect_ust_hk/EWlGF0WfawJIrJ1Hn85_-3gB0MtwImAnYeWXuleVQcukMg?e=Gcjugg&download=1
Miniconda Download:
https://www.anaconda.com/download/success
Syntax
[SYNTAX 01]:
Clone MagicQuill GitHub Repository:
git clone –recursive https://github.com/magic-quill/MagicQuill.git
[SYNTAX 02]:
Create MagicQuill Conda Environment:
conda create -n MagicQuill python=3.10 -y
[SYNTAX 03]:
Activate MagicQuill Conda Environment:
conda activate MagicQuill
[SYNTAX 04]:
Install CUDA 11.8 Torch:
pip install torch==2.1.2 torchvision==0.16.2 torchaudio==2.1.2 –index-url https://download.pytorch.org/whl/cu118
[SYNTAX 05]:
Install Gradio Web UI:
pip install gradio_magicquill-0.0.1-py3-none-any.whl
[SYNTAX 06]:
Copy Llava Environment Files:
copy /Y pyproject.toml MagicQuill\LLaVA\
[SYNTAX 07]:
Install Llava Environment:
pip install -e MagicQuill\LLaVA\
[SYNTAX 08]:
Install MagicQuill Requirements and Dependencies:
pip install -r requirements.txt
[SYNTAX 09]:
Run MagicQuill (in active virtual environment):
python gradio_run.py
[SYNTAX 10]:
MagicQuill Automation Run Script:
@echo off
rem Step 1: Change directory to E:\MagicQuill
cd /d E:\MagicQuill
rem Step 2: Activate the MagicQuill conda virtual environment
call conda activate MagicQuill
rem Step 3: Run MagicQuill
python gradio_run.py
Paths
Miniconda Environments:
C:\Users\**YOUR USERNAME**\miniconda3\envs


