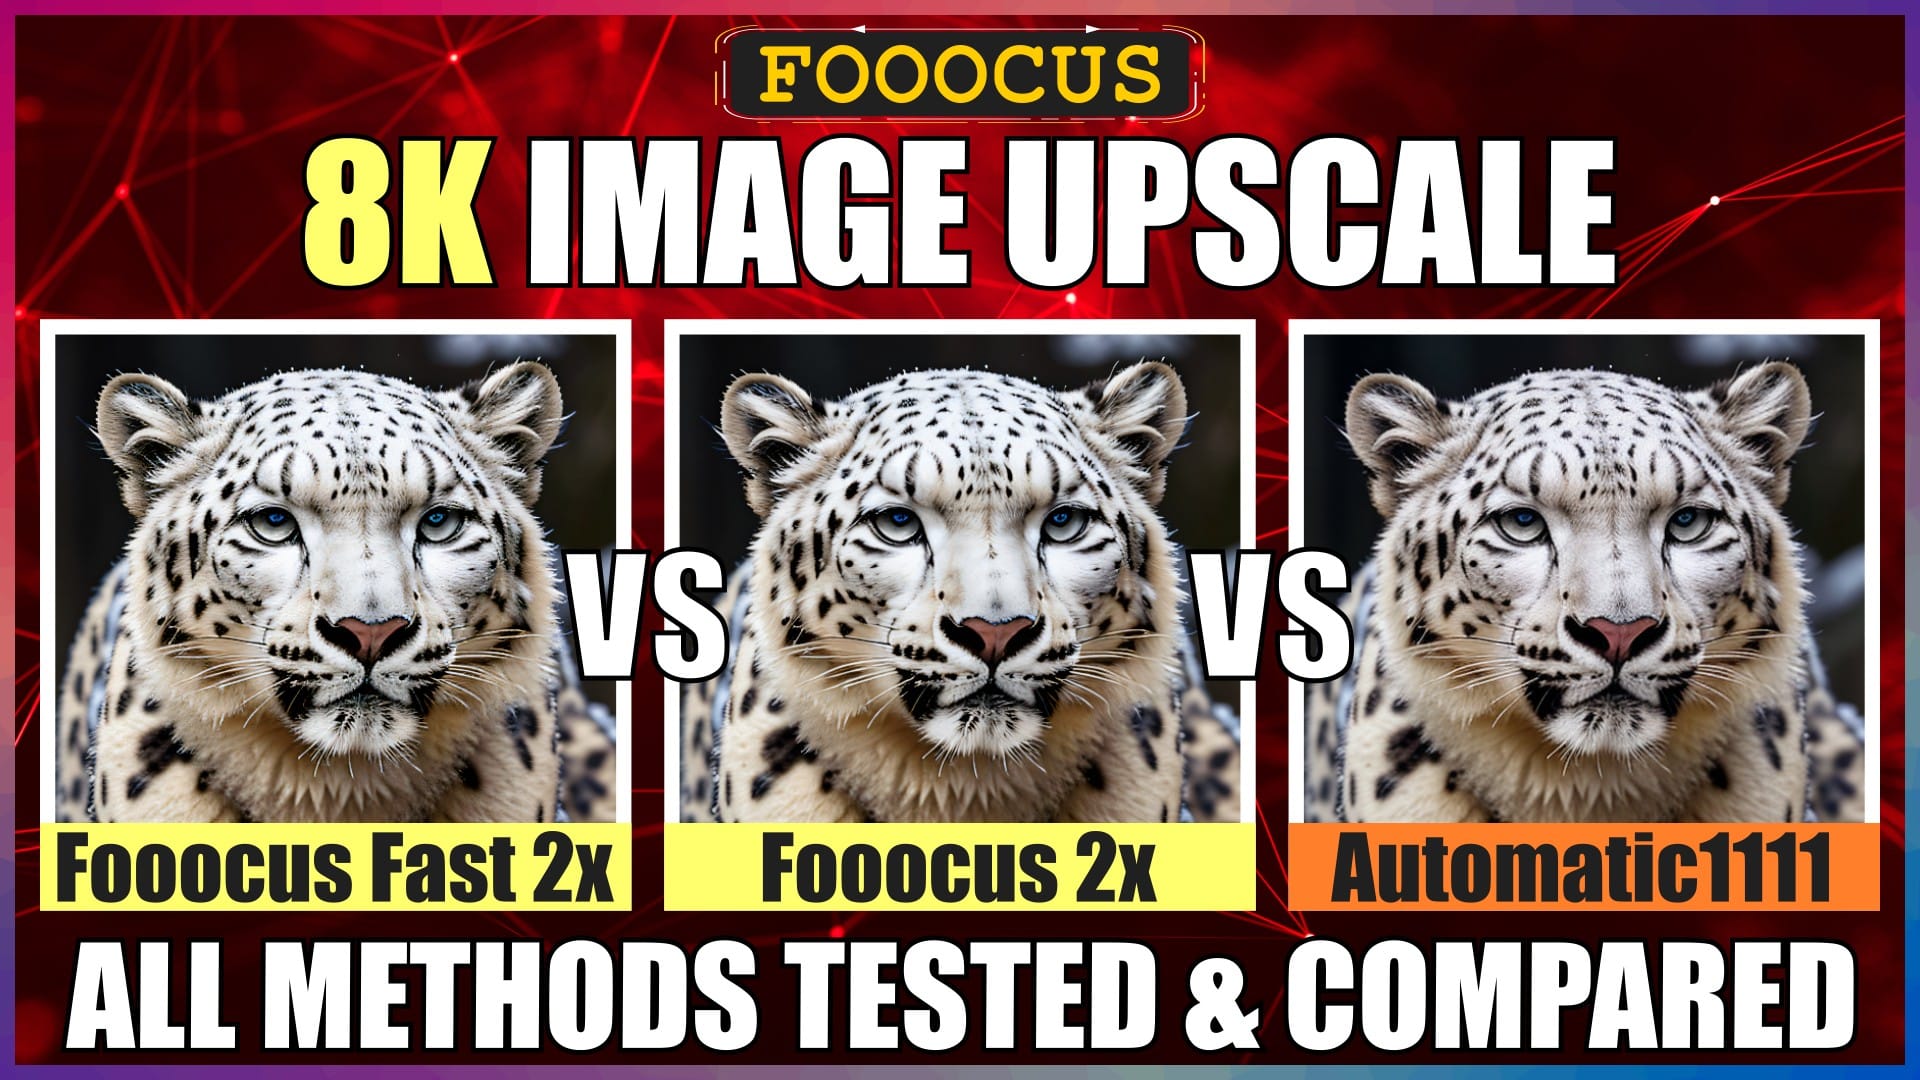
8K Fooocus Upscale Comparison and Tutorial – All Methods Tested

Introduction
Hello there and welcome!
Fooocus has two main ways to upscale images.
The “Fast 2x” upscale option, and the “Standard 2x” upscale option.
Each of these options uses different back-end upscale processes, and each produces very different results.
On top of this, there are some key settings that you can apply to each method, to vary the result even further.
I’ve already run the main variations of each of the methods, to produce a set of four 8K comparison upscaled results.
We’ll start off by taking a look at the final results, and then I’ll step through both of the image upscale methods.
As an interesting bonus, I’ve also upscaled the same image in Automatic1111, so I’ll compare the Fooocus upscale winner with the Automatic1111 result, at the end of the video.
I’ll be running through everything, on a standard local install of Fooocus, running on a Windows 11 PC.
So, let’s crack on.
Upscaled Results and Winner
Let’s jump straight into the final results of the two methods.
On the left, is the base image that we used to upscale.
In the middle, is the final 8K upscaled image, using the Fast 2x option.
On the right, is the final 8K upscaled image, using the Standard 2x option.
Zoomed out, they both look really good, and are both true to the original.
If we zoom in a bit, we can start to see the differences between the two upscaled images.
Although the Fast 2x upscale on the left, seems to have more details, these details appear less natural, overly sharpened, and there’s also quite a few artifacts.
Although the Standard 2x upscale on the right seems a bit softer, I think the end result is a more natural looking image, with an overall higher level of upscaled quality.
So, the Standard 2x upscale option wins overall.
Which is pretty much the case with the numerous other different image upscales, that I also did with both upscale options.
OK. Now we know the winning upscale method, let’s get into the specific details and walk-throughs of each method, which is important for producing the best image upscales, with each method.
Getting Ready for Upscaling
We’ve already seen this base image, that we’ll use to upscale for both methods.
This 512px image, was previously generated in Automatic1111.
Let quickly run through the Fooocus settings, that we’ll use for both upscale methods, so that we can get comparable results.
We’ll switch over to Fooocus.
On the “Settings” tab, we’ll use “Quality” for performance, we’ll leave the “Aspect Ratio” at 1:1 (although this doesn’t really matter), “Image Number” we’ll leave at 1, and for the “Seed”, we’ll set this to zero.
On the “Styles” tab, we’ll uncheck all styles.
On the “Models” tab, we’ll leave it at the default “JuggernaultXL” checkpoint, and “SDXL Offset” LoRA.
On the “Advanced” tab, under “Developer Debug Mode”, we’ll leave the “Upscale Denoising Strength” at the default of -1 for now.
OK, that’s the settings done.
Let’s do some upscaling.
Fast 2x Upscale
Let’s start with the “Fast 2x” upscale method.
We’ll tick the “Input Image” checkbox, below the text prompt box.
Make sure the first “Upscale or Variation” tab is selected.
Since Fooocus v2.5.0, a more advanced “Upscale or Variation” option, in the “Enhance” section is available, but as we just want to do a straight upscale, without any image changes, we’ll just use the “Upscale or Variation” tab, in the “Input Image” option.
Anyway, we’ll drag our base image into the image box.
Then we’ll select the “Upscale Fast 2x” option.
The Fast upscale option, only upscales the input image, without changing it in any way. Pretty much like a latent upscaler does. So we don’t need to worry about denoising strength, to reduce the amount of image variation during the upscale process.
The Fast 2x option, will upscale the image 2 times, from 512px to 1K.
Then we just hit the “Generate” button.
Once the upscaled 1K image is generated, we then need to repeat this same process, to upscale the 1K image to 2K, then again for 2K to 4K and finally for 4K to 8K.
Let’s do the 1K to 2K.
We’ll clear the 512px source image, and then drag down the generated 1K image, to use as the new source image to upscale.
Then we hit the “Generate” button again.
The new upscaled 2K image is generated.
I’ll speed through the next 2 upscales to go to 8K, in exactly the same way.
OK. That’s our 4 upscaled images generated, including our final 8K image.
Onto the next upscale method.
Standard 2x Upscale
Now let’s take a look at the “standard 2x” upscale method.
The standard upscale option work a bit differently to the fast upscale option.
The fast upscale option doesn’t change the base image.
The standard upscale option regenerates the image using Stable Diffusion. Which means that the resulting image has the ability to vary from the original base image, which is not what we want.
In order to eliminate image changes during the upscale process, we need to change the default denoising strength.
Denoising strength determines how much the image is changed.
A low denoising strength, close to zero, will result in little if any change.
Let’s change the denoising value.
We’ll select the “Advanced” tab.
Then in the “Developer Debug Mode” section, we’ll scroll all the way down to the “Forced Overwrite of Denoising Strength of Upscale” setting.
It’s set to -1 by default, which is meant to effectively disable this setting.
However, if we leave it at -1, a significant amount of variation will be introduced into our generated upscaled image.
In fact, in the case of our specific image, it covers the snow leopard in snow.
So, let’s change the denoising value to a super low 0.01.
Then again, we’ll tick the “Input Image” checkbox and make sure the “Upscale or Variation” tab is selected.
Again, we’ll drag our 512px base image into the image box.
Then this time, we’ll select the “Upscale 2x” option.
The “Upscale 1.5x” option, works in exactly the same way as this standard 2x option, but it upscales by 1.5 times, instead of 2 times.
The standard 2x option will upscale the image 2 times, from 512px to 1K.
Since we originally selected the “Quality” performance option in the “Settings” tab, the upscale process will go through 36 sampling steps, instead of just 18 with the “Speed” option.
Anyway, then we just hit the Generate button.
The new 1K upscaled image is generated.
Now we go through the same process, as we did with the Fast 2x upscale, to swap the generated upscaled images into the source image box, and upscale another 3 times to get to our 8K upscaled image.
OK. That’s our 4 upscaled images generated, including our final 8K image.
Upscaled Results
Let’s take a quick look at the final results again.
This is the base image and 2 upscaled images at 0% zoom.
These are the 2 upscaled images at 20% zoom.
So, the Standard 2x upscale option wins overall.
Fooocus vs Automatic1111 Upscale
As I said at the beginning of this video, I also did an 8K upscale of the same base image, using Automatic1111.
On the left, we have the Fooocus upscale winner, using the standard 2x upscale method.
On the right, we have the Automatic1111 upscale result.
Even without zooming in, you can clearly see the better upscaled result, that Automatic1111 produces, especially in terms of detail and a natural look.
If we zoom in a bit, the superior result from Automatic1111 over Fooocus, is even more obvious.
Fooocus is my go to UI for certain tasks, but when it comes to upscaling images, I always just go straight to Automatic1111.
Take a look at my Automatic1111 8K image upscale video if you’re interested. I’ll leave the link to it in the description below for you.
Conclusion
Now you know the best Fooocus image upscale method to achieve the best results, and you also know the step-by-step process to carry out both methods.
You also got a valuable insight, into how the best upscale result from Fooocus stacks up against the Automatic1111 result.
Anyway, hope you found this video helpful, and I’ll catch you in the next one.
Links
8K Upscale with Ultimate SD Upscale in Stable Diffusion Automatic1111:
https://youtu.be/jD7ojw1u1AI


